Architecture
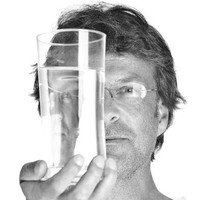
The simple idea behind the “mugshots” project is to be able to generate a side view from a given image showing the front view of a face. I know what you are probably thinking, “…that’s not possible.” Nonetheless, after reading the Image-to-Image and U-Net paper and some others covering the topic of a generative adversarial network (GAN), I thought it would be a fun test project to try it out – anyway. The GAN model I implemented is based on these papers with some alterations.
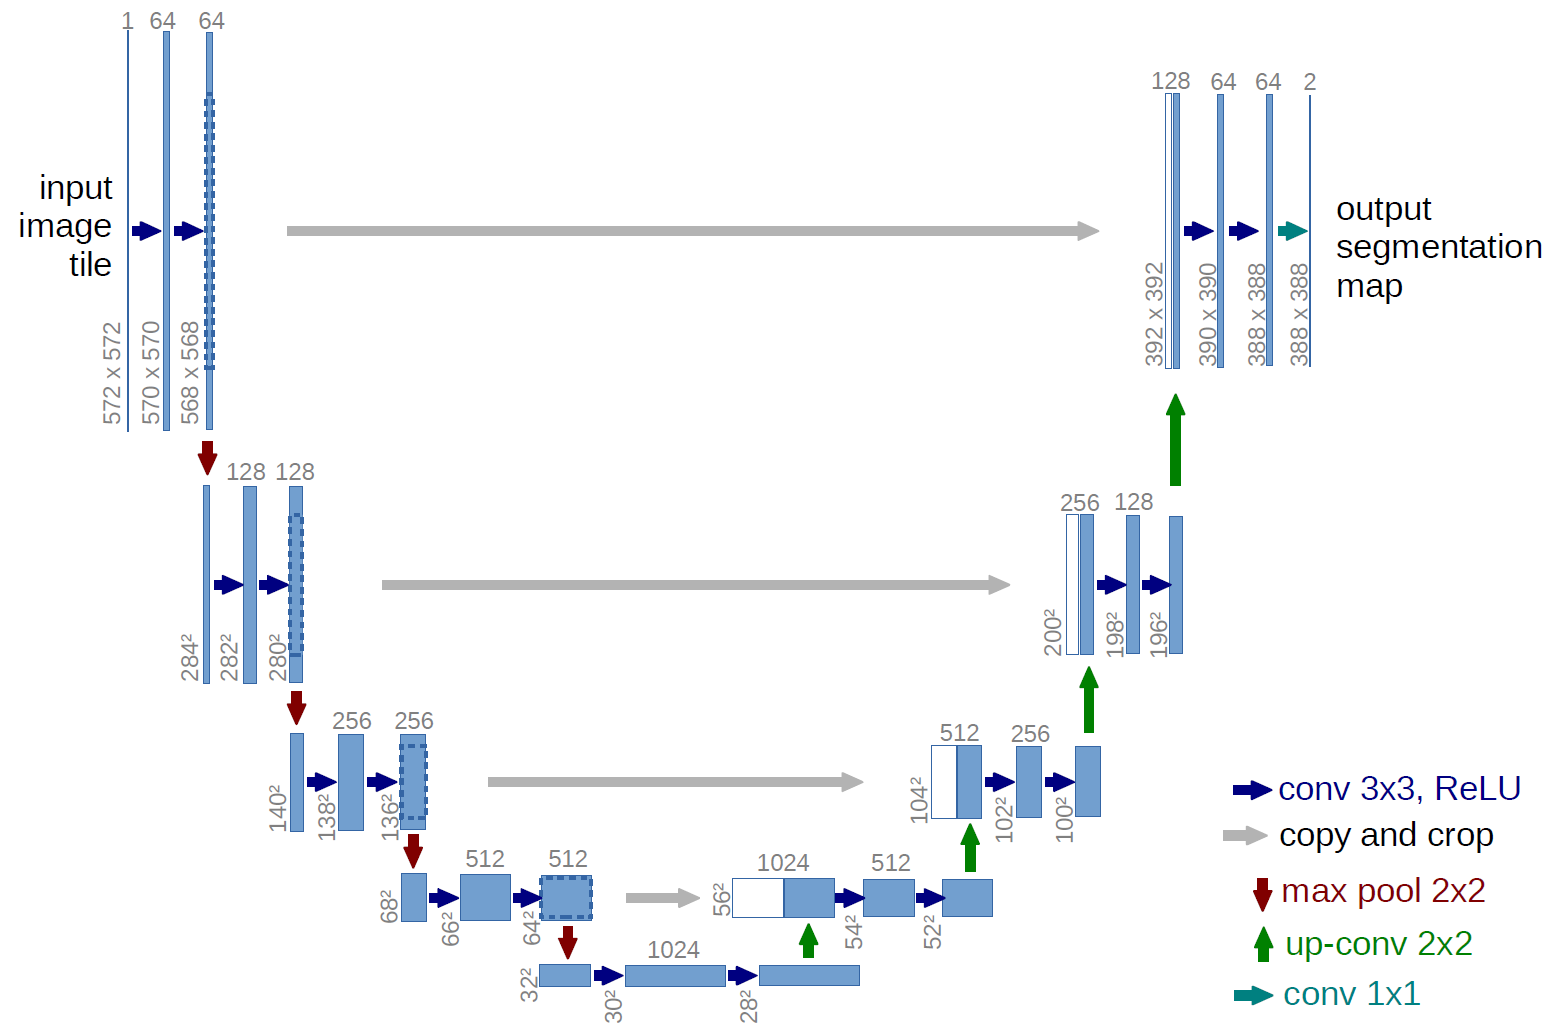
In the previous post, I covered the Image-to-Image paper. The Image-to-Image paper states that it uses a “U-Net”-based architecture for its generator, and a convolutional “PatchGAN” classifier for the discriminator. The alteration I made are all in the U-Net. The U-Net has on the left side a downsampling path and an upsampling path on the right side. The “minor” addition here is that I added fully connected layers to allow parts to move around.
Flatten ->
Dense -> LeakyReLU ->
Dense -> LeakyReLU ->
Dense -> LeakyReLU ->
Dense -> LeakyReLU ->
Dense -> LeakyReLU ->
Reshape
In general, I kept the given structure as described in the paper as is:
Dataset
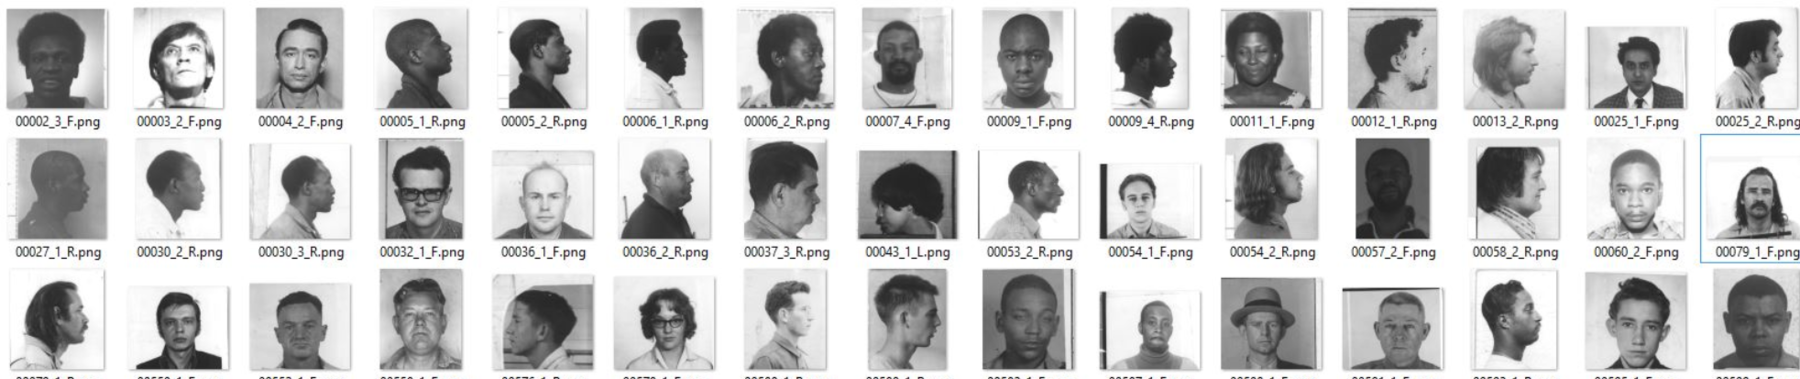
The unzipped dataset has several sub-directories, of which we only use the sd18 directory. To make it easier for me to handle the data, I organized the images by splitting them into a train and test set and ultimately saved everything into an hdf5 file. In total we have 2434 images, one half is the front view and the other half the side view.
- I copied all images from the sd18 sub-directories into its own directory and renamed them.
- Because all given images are of different sizes and ratio, I resized them to 256x256.
- To make it a bit easier, I made sure that all side view images are the right view by flipping the left picture using numpy (
np.fliplr(image)). - After that, I split the dataset into train and test directories (80/20).
Now the paper states also that it randomly jitters the images. Because more is better in machine learning, I used to that moment to “generate” more images. Leaving the selected test images and all side view images for the time being alone, I wanted to multiply the train images by 4. To achieve that I iterated four times over each image and resized them slightly up, followed by randomly cropping it back down to its original size and finally randomly flipping them left to right.
def random_jitter(image):
    image = tf.image.resize(image, [286, 286], method=tf.image.ResizeMethod.NEAREST_NEIGHBOR)
    image = tf.image.random_crop(image, size=[256, 256, 3])
    image = tf.image.random_flip_left_right(image)

    return image

for filename in filenames:
    image = load(filename)
    for i in range(4):
        image = random_jitter(image)
Now where we have from each front view four slightly different once, we need to duplicate each side view image in the training set to match the number of front view images.
Note: We might want to look into Keras ImageDataGenerator class to generate batches of augmented tensor image data. Similar to what I have done above with the images, we can rotate, zoom, flip, etc.
datagen = ImageDataGenerator(
    featurewise_center=True,
    featurewise_std_normalization=True,
    rotation_range=20,
    width_shift_range=0.2,
    height_shift_range=0.2,
    horizontal_flip=True)
As a final step, I saved the images into an hdf5 file. It might be easier to keep all the pictures in their directories and use .flow_from_directory(directory) or other avenues to not run into OOM errors. Which is especially frustrating when that error pops up halfway through the training process.
Generate
Before we can generate an image, we need to build our GAN model. As I mentioned above, I added five extra layers at the bottom of the “U.”
    x = tf.keras.layers.Flatten()(conv7)
    x = tf.keras.layers.Dense(512, input_shape=(1, 1, 512), name='dense1')(x)
    x = tf.keras.layers.LeakyReLU(alpha=0.2)(x)

    x = tf.keras.layers.Dense(512, input_shape=(1, 1, 512), name='dense2')(x)
    x = tf.keras.layers.LeakyReLU(alpha=0.2)(x)

    x = tf.keras.layers.Dense(512, input_shape=(1, 1, 512), name='dense3')(x)
    x = tf.keras.layers.LeakyReLU(alpha=0.2)(x)

    x = tf.keras.layers.Dense(512, input_shape=(1, 1, 512), name='dense4')(x)
    x = tf.keras.layers.LeakyReLU(alpha=0.2)(x)

    x = tf.keras.layers.Dense(512, input_shape=(1, 1, 512), name='dense5')(x)
    x = tf.keras.layers.LeakyReLU(alpha=0.2)(x)

    x = tf.keras.layers.Reshape((1, 1, 512))(x)
I found by adding these layers allows the pixels to move around; otherwise, the model just returns a static image and simulates a simple “Photoshop” filter.
In regards to the discriminator model, I didn’t make any alterations to what is described in the paper and implemented as is. Similarly, I used the same hyper values to “tune” the model and loss functions.
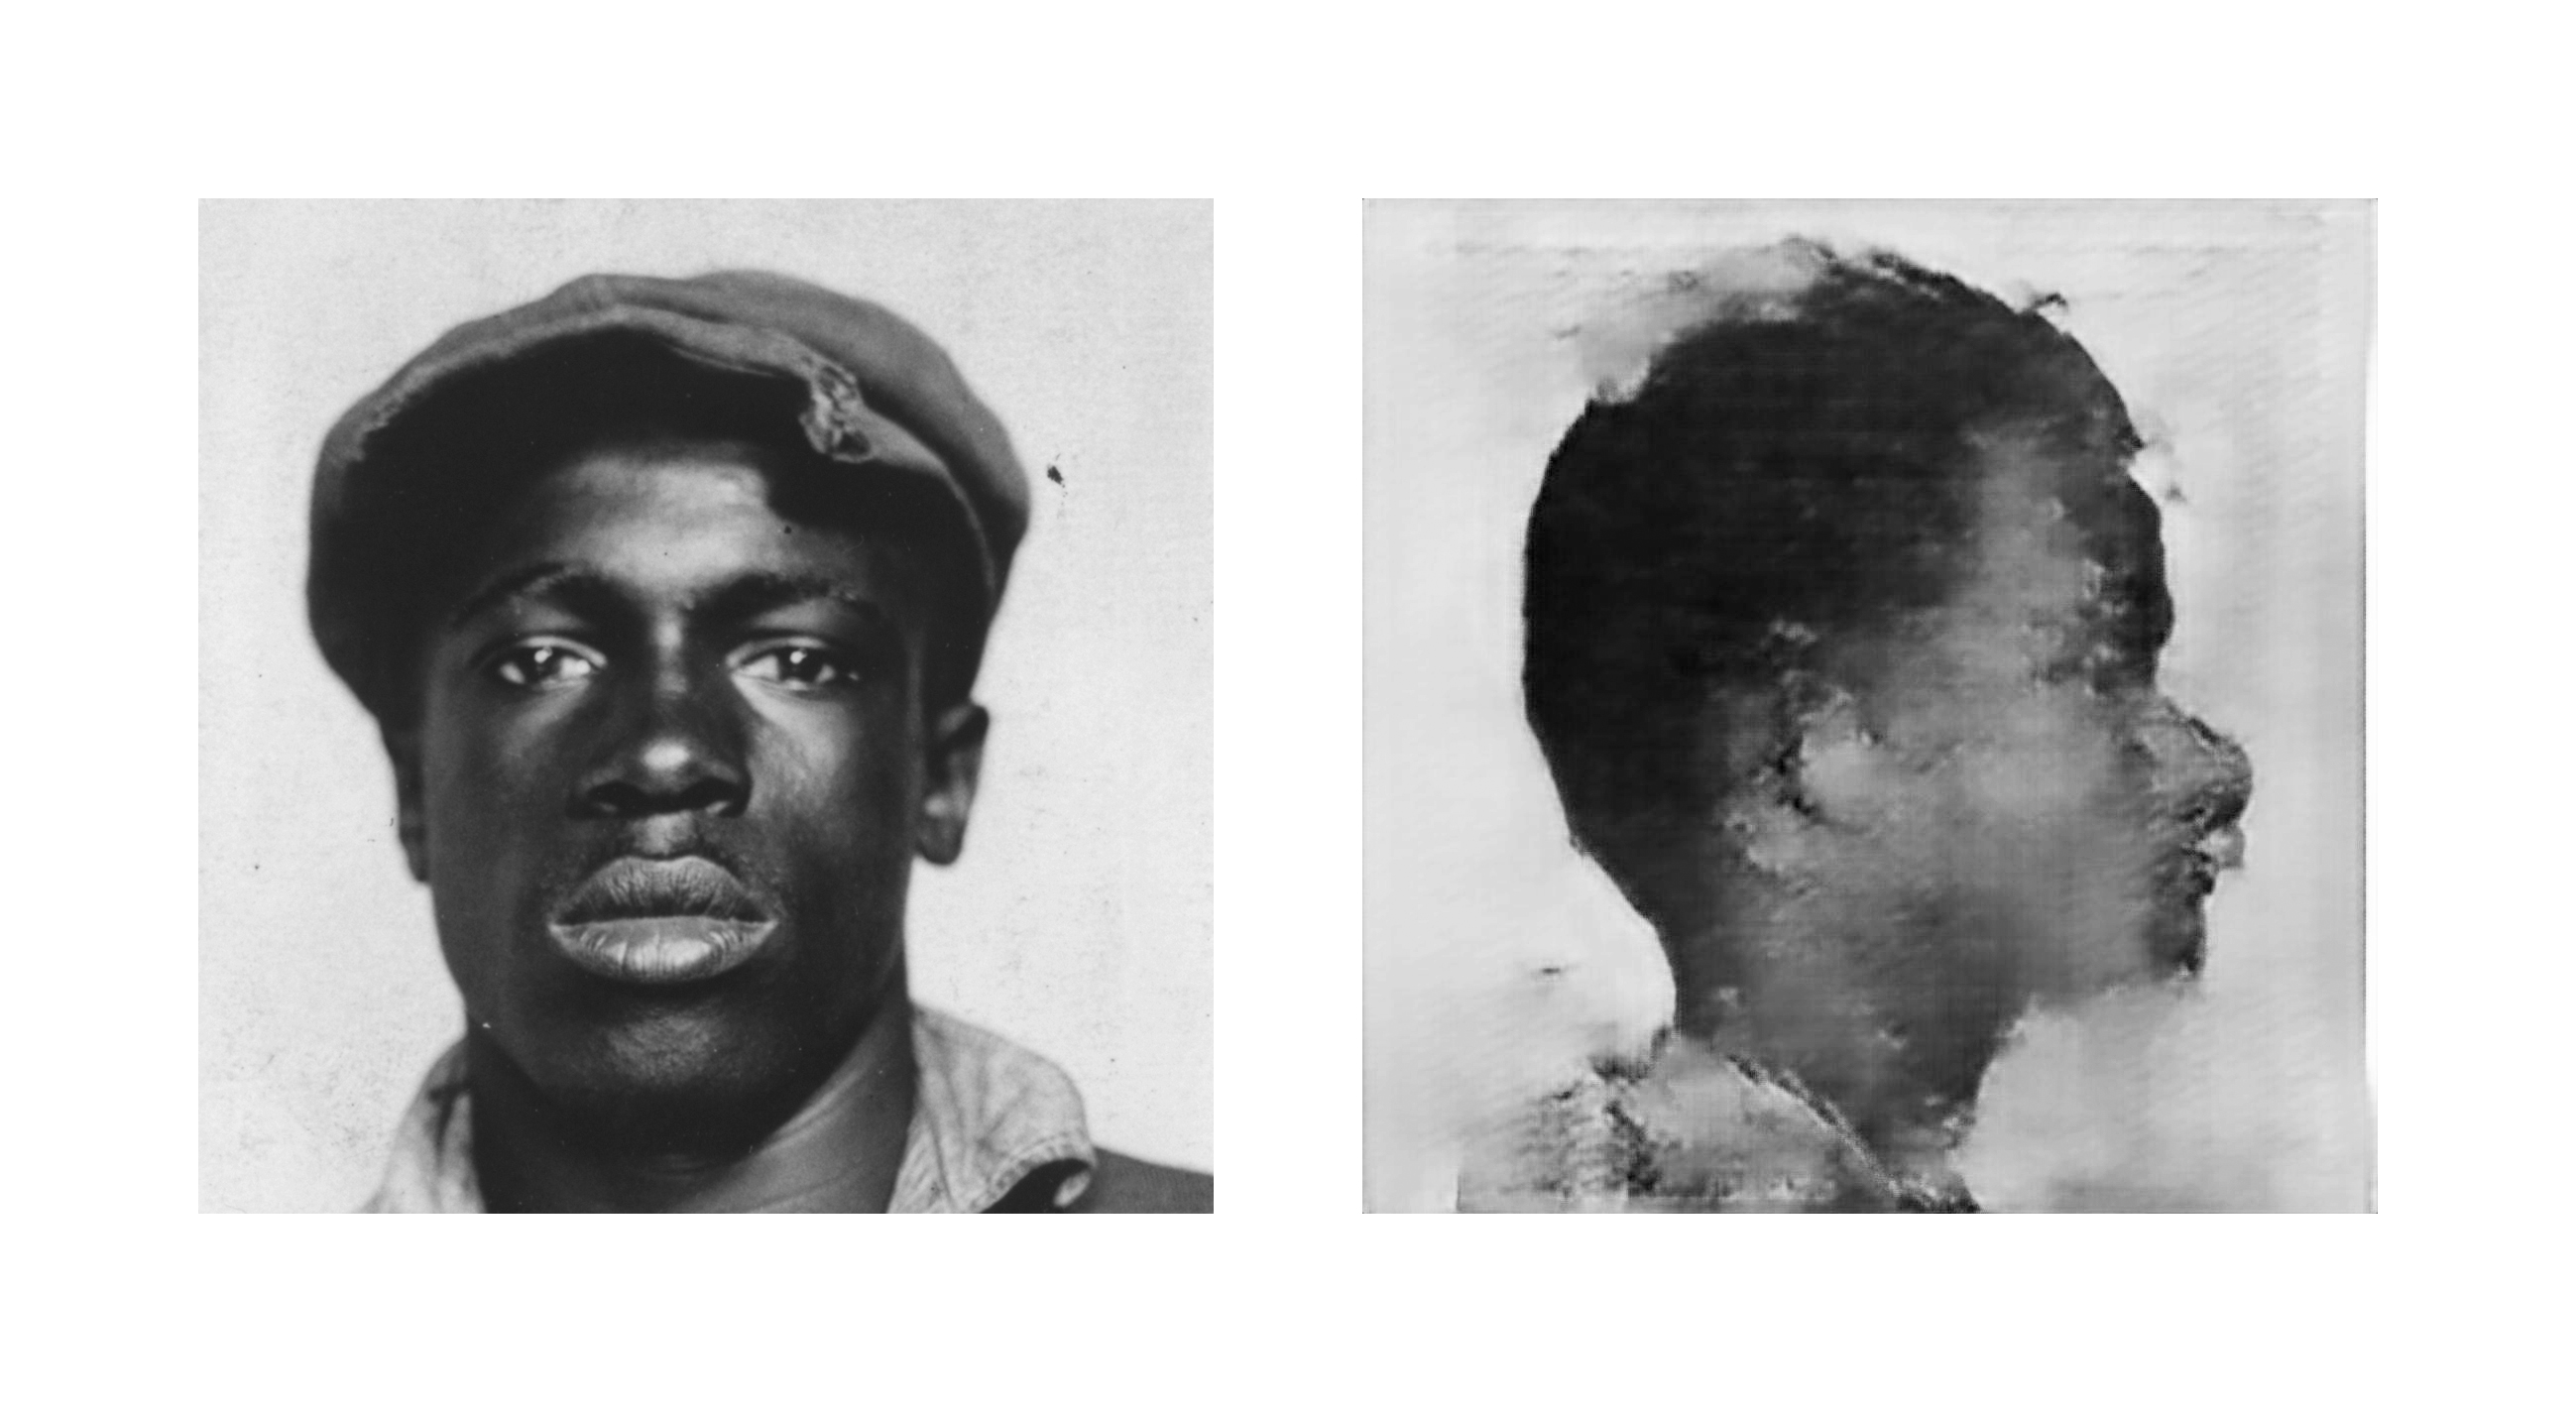
Result (so far)
Thoughts
For an “art” project, it is interesting and very satisfying to see the first results. Also, I learned a lot, how to translate an academic paper into machine learning code but also to be able to modify it in a way that it is not breaking but improving the final result.
Next step, I will try to keep the original number of images as is and try to use different augmentation techniques using tensorflow. As well as exploring various options to minimize the memory footprint, especially if we want to use images which are maybe $1024 * 1024$ instead of just $256 * 256$ in dimension.
And finally, create a dashboard to drop in an image with a front view of a face to generate a side view.
You can find the code here, but be aware that the project is a “work in progress.”